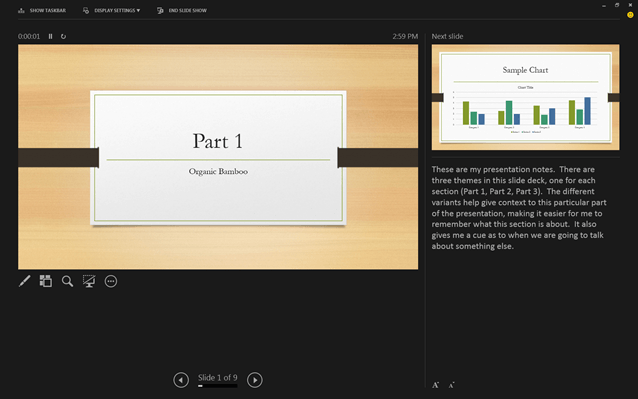
The Presenter View option allows PowerPoint users to show the audience the slide show while giving the presenter a view of upcoming slides, a timer, notes to yourself, and other handy tools. (If you haven’t yet, be sure to give it a try.)
The problem is that every now and then Presenter View doesn’t happen, and the laptop screen only shows the slides. Most people don’t memorize where these controls are, so in this situation, users are often forced to press on without the use of Presenter View. Since this little headache pops up from time to time, it pays to know how to set this option.
For Windows PC Users: At the top of the PowerPoint screen are a series of tabs. Click on the one that says Slide Show. In the ribbon’s Monitors section, you will see a check box next to the words Use Presenter View. Check this box and Presenter View will start up when you begin the slideshow.
 Mac Users: Click on the Slide Show tab and look for a section titled Setting for Two Displays. Click on the icon that says Presenter View, and then start your presentation again.
Mac users may also need to be sure that their laptop is not set to mirror the displays. To do this, click on the Apple icon in the top-left of the desktop, then click on System and choose Display. Click on the Arrangement tab at the top of that screen and be sure that the check box next to Mirror Displays is unchecked.
 Lastly, if the Presenter View shows up on the wrong monitor simply click on the Display Settings button at the top of the Presenter Tools page and select Swap Presenter View and Slide Show.
Of course, Classroom Support is always available to help with this. Call us at 214-768-8888, and we’ll be glad to set it up for you.


