I’m constantly looking for tips on how to work more efficiently in Microsoft. The Office suite is so powerful that I’m pretty sure we underutilize the resources at our fingertips.
If you’re struggling with the “I want to learn, but I don’t have time…” sentiment consider sharpening your skills in 15 minute bites. A couple of weeks ago, I stumbled on Microsoft’s Tuesday morning webinar series and was perusing through their archives. You can join their webinars live or watch at your own convenience.
Here’s a sample of their Office Timesavers session:
https://www.youtube.com/watch?v=QF3H02gi3oA#t=605
You can view upcoming Office webinars here. Got your own Microsoft Office tip you’d like to share? Let us know at ittraining@smu.edu and we’ll be sure to pass it on!

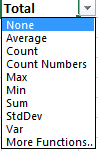 Selecting the Total Row not only adds a total line to your table, but it also has built in functions that you can toggle to further analyze specific data.

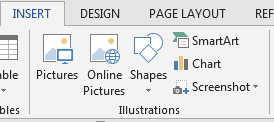
 If you use the styles in Word, not only can you create a consistent polished document, but you can also use the Navigation view to help rearrange and jump to various portions of the file quickly. You can enable navigation view from the View menu, or you can simply click on the page number in the bottom left corner of the screen. There are three options in the navigation panel. Viewing by headings allows you to view the overall structure of your document but also allows you to reorder the sections in a document simply by dragging and dropping! The page view displays a thumbnail image of each page in the document. You can jump to the desired page by clicking the thumbnail. The results view allows you to search for words, images etc in your document and then navigate to each instance where that search term was detected. To turn off the navigation view, just click on the page number on the bottom left and you’re back to full screen view of your document.
 Available actions properties: I admit I stumbled across this nifty feature while I was writing this article!
 hat we use in multiple documents. For example, if you often arrange meetings or events on campus, you may include a map, driving directions and parking instructions in each event packet. You may reuse your contact/signature block in documents or a specific logo frequently. All of these types of data can be stored in your quick parts gallery! Simply highlight the text—then select Insert—Quick Parts—Save selection to quick part gallery. Once you’ve named and saved that component, it will be available from the Insert- Quick Parts menu in any document you create from that same machine!