The DVD that Lasts 1000 Years

By John Blankimage003

Did you know that most burned DVDs and CDs don’t last long? Have you ever placed a 5-year-old DVD in the drive only to find out it was no longer readable? This would be tragic if the DVD was your wedding video, pictures of a vacation or other keep sake. There were DVDs that you could obtain that would last longer, but they were expensive and hard to find. Now there is a new technology that is changing all of this. The Millenniata M-Disc is a 4.7GB DVD with a data layer made out of stone-like metals and metalloids. Burned CDs and DVDs have a very soft recording/data layer that isn’t very resistant to heat, humidity and light. However, the M-Disc on the other hand has a much tougher data layer that last for 1000 years. Unfortunately, M-Discs can’t be burned with your current DVD burner. It takes a laser that’s five times stronger than normal to melt stone. On the other hand, M-Discs are backwards compatible and can be read by normal DVD drives. When you replace your CD/DVD burner make sure it is M-Disc compatible.


Cam Scanner: Scan on the Go

By: Rajat Shetty

Most offices are well equipped with high definition scanners, printers, copiers, etc. However, there are instances when people need to scan documents on the go, and a scanner is not readily available. The Cam-Scanner app makes scanning in almost any location possible.

cam scanner1 cam scanner2

While this application is not suitable for high definition scans, you can surely use it for urgent and basic scans of a two or three page document. I scanned my homework with this application, and it worked just fine!

The free version for Cam-Scanner is available in the Apple-App store and the Google Play store (For Android devices).  This easy to use app scans documents with your cellphone camera.

To scan a document, follow these steps:

  1. Download the Cam-Scanner application from your App store and install it on your smartphone.
  2. Place the document you wish to scan in a well-lit area.
  3. Capture the image by pressing the center button on the screen.
  4. Make sure that the entire document is selected, and the edges are not cropped.
  5. Once the image is locked, you will be able to crop the image you clicked as well as adjust the brightness, contrast, and other parameters.
  6. Once you have done this, you can click next, and the scanned image will be generated.
  7. You can convert this image into PDF format and email it immediately, or you can save it on your phone for future use.

Here is a screenshot of scanned document from my Android phone:scanner sample

The drawbacks associated with this particular application are that you need the latest cell phone which has a high resolution camera (Probably 8 mega pixel onward). Also it’s not suitable, if you are looking to scan large set of documents or books. For a fully functional Cam-Scanner, you can buy the full version called “Cam Scanner Pro”. This is available on App-stores for both Apple and Android phones. However, the free version works fine for small sets of documents.  The best part is you can scan, edit, and email the scanned document from your phone, within a matter of minutes.

Pivot Tables in Excel 2013

By: Rajat Shetty

Excel Pivot tables help summarize your data. They also allow you to avoid using complex formulas like Vlookup, SumIF, etc. to create a table. It can take a little while for a newbie to get the hang of Pivot tables. However, the 2013 Excel updates make creating Pivot tables even simpler.

A few years back, we had to follow these steps to create a simple pivot table:

  1. Select the data range
  2. Insert pivot table from the Insert tab
  3. Go to the new worksheet to check if all the fields are appearing or notchart1

4. Manually drag and drop the required fields according to our requirements to calculate-Sum, average, percentage, etc.chart2

chart3

With the new Microsoft Excel-2013, you are just one click away from creating a basic pivot table. The best part is you do not have to drag and drop anything into the field list. As seen to the right, you can pull the exact information you need from a complex spreadsheet without having to go through the above mentioned steps for Excel-2010.

How do you create Pivot tables in 2013?

Instead of inserting a Pivot table from the Insert tab, just click on the “Recommended Pivot Tables” option on the Insert tab.

chart4As you can see in the above image, Excel automatically suggests three or four options for your data range. All you have to do is make sure that your cursor is in one of the data entries on the main sheet before you click on “Recommended Pivot Tables”.

When you select one of the recommended Pivot tables, it automatically adjusts the fields without the user having to drag and drop in the Pivot table field list. Once the Pivot table is created you can customize the fields according to your requirements.

chart5

In summary, we use the following steps to create a Pivot table using Excel-2013:

1. Organize and arrange data in columns
2. Make sure each column has a heading
3. Click on Insert and select the “Recommended Pivot Charts” option
4. Choose the desired Pivot table
5. Sit back and relax

Here’s looking forward to future updates from Microsoft Office. Maybe next time Excel will be even more intuitive.


Security Training

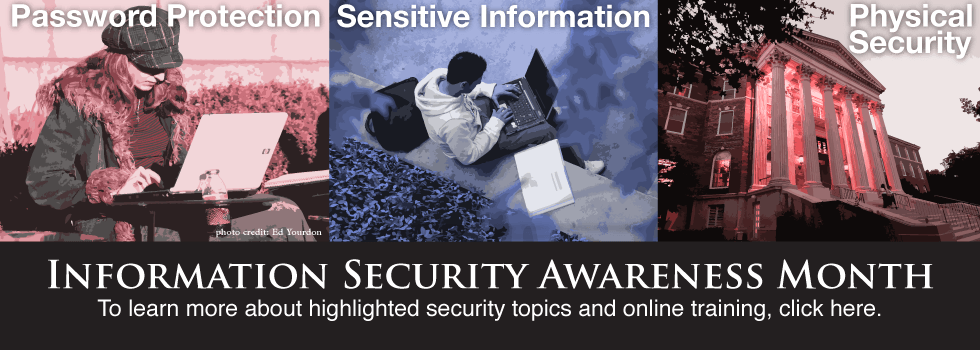
This October as a part of Information Security Awareness Month we are offering an online training for SMU Faculty and Staff. The training only lasts about 30 minutes; however, it is filled with valuable information that can help protect you and the University. Below are some of the topics covered in the training. You are our best defense. Are you prepared?

threat-icon

Social Engineering– Many of today’s most common cyber-attacks are based on social engineering. As such, we explain what social engineering is, how attackers fool people and what to look out for. We show how you can detect these attacks and respond to them.

email-iconEmail and IM- One of the primary means of attacks and exploitation is through email in both simple or large scale attacks and targeted spear phishing attacks. We explain how these attacks work, including recent examples of phishing, spear phishing, malicious attachments and links, and scams. This video shows how to detect these attacks, respond to them, and use both email and IM securely.

file-sharing

Social Networking- Sites such as Facebook, Twitter and LinkedIn have exploded in popularity, with employees and managers sharing all sorts of private information, not only about themselves but about their work. Cyber attackers know this and use this information for identity theft, spreading malware, scams and even targeted attacks. We discuss these risks and the steps you can take to protect yourself and SMU.

Mobile Devices- Today’s mobile devices are extremely powerful, including tablets and smartphones. In most cases these devices have the same functionality, complexity and risks of a computer, but with the additional risk of being highly mobile and easy to lose. We cover how to use mobile devices safely and how to protect the data on them.

security-Training-and-EdWi-Fi Security– This section discusses the risks of public Wi-Fi and steps that you can take to protect yourself. In addition we cover that only authorized Wi-Fi access points with prior management approval can be deployed within SMU.

Telecommuting Working Away from Home- Many SMU employees are no longer working at the office, they work from home or on the road while traveling. There are unique risks for the telecommuter. This module focuses on how these employees can protect themselves and SMU, including laptop security and creating a secure, mobile working environment.

Security-Icon

Physical Security- While physical attacks against your data are less likely to happen, when such incidents do occur they can have a greater impact on your organization. In this module we explain how attackers will attempt to trick and fool their way into restricted areas. We also discuss how you can protect the physical security of your facilities, including enforcing use of SMU-issued identification badges.

Hacked- No matter how effective a security team and their processes are, there will be incidents. This module focuses on how you can help by identifying and reporting an incident. We cover things to look for, such as suspicious activity or virus alerts and whom to report an incident to.

Faculty and staff can login to courses.smu.edu with their SMU credentials to access the training.

Last Week of Information Security Awareness Month

Info-Sec-2013-web-slide

This is the last week of Information Security Awareness month. All training content is posted within Blackboard to simplify the process. It requires about 30 minutes to complete the course. However, you do not have to complete all the videos in one sitting.  Most of the videos are just a few minutes long. The training will remain available after the end of this month; however, we encourage you to take the training as soon as possible, especially if you use sensitive information like credit cards or social security numbers in your day to day activities.

To complete the training:

1. Visit https://courses.smu.edu.
2. Login with your SMU ID and password.
3. Locate the Security Awareness 2013 course in the My Courses section.
4. Click on the tutorial you wish to preview.  Blackboard will remember which ones you have completed and which still remain.
5. Complete the 3 question quiz at the end of each tutorial.

Later this fall, the training will be uploaded to your training transcript in Access.SMU.