To follow along with last week’s post we wanted to give you a few tips on using screenshots in the Microsoft Suite.
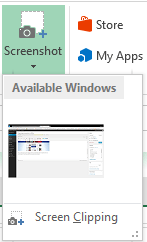
From the Insert tab (available in all of the Office products), select the Screenshot  icon. Microsoft gives you two options you can use to insert an image. Click on the drop down arrow and either select Available Window, which gives you the option to insert another window into your document like in the example below:
 Or, you can insert a Screen Clipping, which allows you to select the specific item you want to insert. First, click on the window you want to grab the screenshot from to make the window active. Next, go back to the Office product you want to insert the screenshot into. Select the Screenshot icon and select Screen Clipping, the window that you were previously on will gray out.
The cursor will change to a cross +. Left click and select the area you want to insert. Here, I selected just the clip I wanted.

That’s our quick tip of the day. Happy screen clipping!


