 You may already know that Zoom is an excellent way to conduct online meetings and webinars, but did you also know that it can also be an easy tool for quickly recording your screen and audio? All you need is the Zoom Meetings Client and a microphone! This comes in handy if you need to make a quick instructional video or visually document an issue or process.
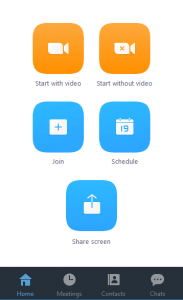
To get started, open the Zoom application on your computer and click on the Start without Video button. If you want to use your webcam to record yourself alongside your desktop or by itself, click Start with Video. When prompted, click on Join Audio Conference by Computer so Zoom will record your PC’s microphone. Now, you have started a “meeting” with yourself as the only participant. Click on the Share Screen button. In the window that appears, select the Desktop option to capture your entire desktop. You can also select specific applications or displays to capture if needed. Once selected, click the Share Screen button and the chosen application or screen will have a green border surrounding it to verify that it is being shared.
 Now, you’re ready to record! At the top of the screen, move your cursor to the green area where your meeting ID is listed. A menu will appear:
 In this menu, click More, then either Record on This Computer or Record in the Cloud. There will now be an indicator on your screen verifying that the meeting is now being recorded. You may want to make a really brief recording first to confirm that your equipment is working as expected.
When you’re done recording, go back into your Zoom toolbar as pictured above, click on More, then End Meeting. If you selected the local recording option, the Zoom app will begin compressing the screen recording and save it on your computer. If you selected cloud recording, your video will appear in your Zoom account within a few minutes depending on its length. Once the video is saved, you can edit it in your choice of video editing software if needed.


