 We all have had the situation where our computer has locked up or crashed while we are working on that important document that we, of course, didn’t save soon enough. Well, I won’t tell you that Code42’s CrashPlan backup software will protect you from failing to “Save, and Save Often,” but it will save you from catastrophic hard disk failure.
CrashPlan is preloaded on all new University computers to provide daily backups of files in your user folder. This way, if your hard drive fails, IT can restore the University applications using LANDesk and your files with CrashPlan. This backup plan will also allow the install teams this summer to quickly restore your files to a new pre-loaded computer. If you have an older computer that is scheduled for an upgrade this summer, then you definitely want to have CrashPlan running.
Getting Started
If you haven’t used CrashPlan before, don’t worry it’s an easy process. You might already have CrashPlan installed. Just try searching for CrashPlan in the Window’s Search Window or Mac’s Spotlight search. If the application doesn’t show up in the results, you will need to download the latest version of CrashPlan from LANDesk. Once installed, it would be best to restart the computer. After the restart, launch Crash Plan, then follow these steps:
- When launching for the first time CrashPlan will need to authenticate your account. If you haven’t used CrashPlan before, select New Account, otherwise select Existing Account.
- Enter your SMU ID and Password in the Single Sign-On screen and click Login.
- That’s it.
Verify your backup
To verify your computer is backing up, launch CrashPlan.
Version 4

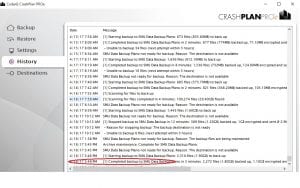
On a Mac, click on Window in the Menu Bar and choose History from the drop-down, or on Windows, click on History in the sidebar to verify that the backup has completed recently. It should say “Completed backup to the SMU Data Backup…” in the history list
Version 5
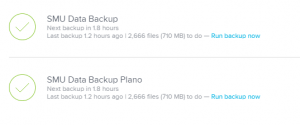
 On both Mac and Windows, click on Details to the right of your computer’s name. Details on when the last backup occurred will display.
Restoring Files
To restore a file to your computer, click on the Get Files button in the CrashPlan window.
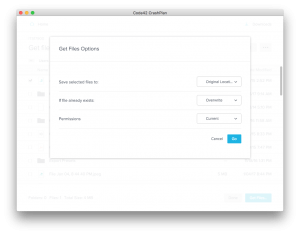
 In the Get Files Options window, browse to the file or folder you want to restore.
- Click on the checkbox next to files or folders you wish to restore.
- Click on the Get Files… button.
- Choose how you want to deal with the file(s) and where you want to save.
- Click Go.
The file(s) will be restored as selected.
If you have any questions or concerns about using CrashPlan or backing up your computer, please contact the IT Help Desk at 214-768-HELP or help@smu.edu.


