 You may have heard of Instagram after Facebook purchased it for $1 Billion in 2012, but many still are not really sure what it is or does. The simple answer is Instagram is a photo and video sharing app. Sort of a Facebook for pictures, and part of the reason Facebook acquired it. You can take photos, add filters to them (this is one of Instagram‘s signature features), share photos, tag your friends, browse other great photos from all over the world. In this post, we are going to cover some of the basics of using the popular photo sharing app, Instagram.
The Basics
![]() To begin, you’ll need to download the iPhone or Android app to your device in order to register an Instagram account. By default, these accounts are public. If you need to have a private account, you will find that option in the Privacy settings.
To begin, you’ll need to download the iPhone or Android app to your device in order to register an Instagram account. By default, these accounts are public. If you need to have a private account, you will find that option in the Privacy settings.
 After creating an Instagram account, you can use the app to to take a photo. To take a photo, just point your device at something photo worthy and press the blue button. If the app needs help focusing, you can tap and hold on an area in the preview to focus on that area. Once it’s locked focus, just press the blue button to take a photo.
What you might notice, is the preview is square. This is part of the Instagram‘s signature look. All photo (and videos) on Instagram are square. There are apps to help keep your photos in a more standard 2×3 or other format, but when it’s shared to Instagram, it will be a square image just with a matte to fill in the space.
The Filters & Effects
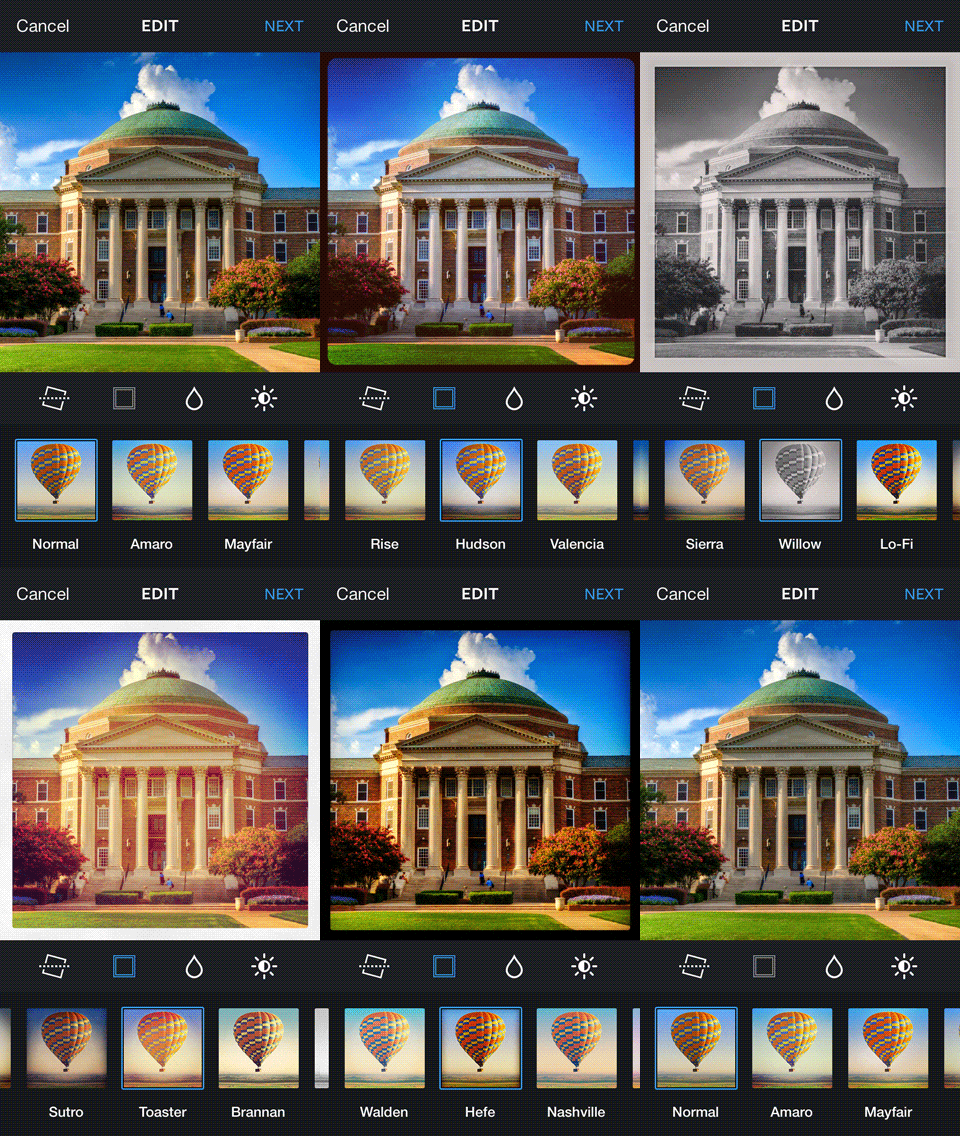
Once you have taken your photo, you can use any one of the many filters to give your photo that signature Instagram look. Your choices are:

- Normal
- Amaro
- Mayfair
- Rise
- Hudson
- Valencia
- X-Pro II
- Sierra
- Willow
- Lo-fi
- Earlybird
- Sutro
- Toaster
- Brannan
- Inkwell
- Walden
- Hefe
- Nashville
- 1977
- Kelvin
Now, you don’t have to add filter to your image and many people don’t. In fact, some even brag about it when posting their photo by using the #NoFilter hashtag. We’ll get into hashtags a little later.
Borders & Frames

 Many of the filters have a unique border/frame for each. You can choose to use it or not by clicking on the Border icon to toggle the frame on or off.
Tilt-Shift

 You may also want to try experimenting with the Tilt-Shift feature. By click the Tilt-Shift button, the one that looks like a water droplet, you can change the focus to center on a specific area or create the look of a shallow depth of field, typical of a photo taken with a DSLR and a $2000+ Tilt-Shift lens. Using your fingers, you can change where the focus is centered and how shallow.
Once you have your masterpiece, it’s time to share it with the world. Just click the next button to continue.
Sharing & Tagging
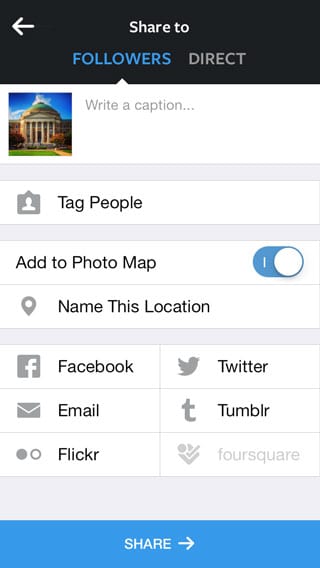
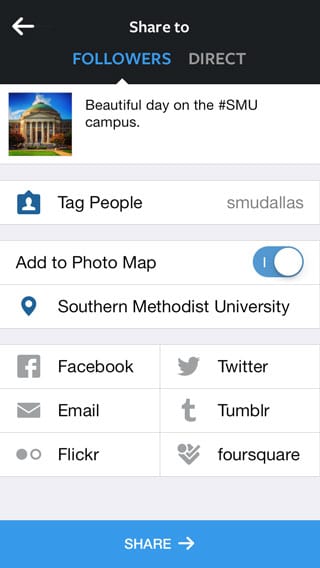
 On the Sharing screen, you can give your image a description, tag people, and give your photo a location.
In the description, you can use hashtags to make your photo searchable by other Instagram users, just like on Twitter. To make any word searchable, just use a number/pound/hash sign (#) before the word. While it is considered poor form to #make #every #word #a #hashtag, you can #CombineWordsForFun.

Some popular hashtags related to SMU are, of course, #SMU, #NewMoody, and #PonyUp.
Tagging People


 You can also tag another Instagram user in the photo. This will show up in the user’s notifications and in their profile. To tag someone, just click the Tag People button to begin. The screen will show your image where you can touch an area to mark that person. The Who’s this search will allow you to search for other users in Instagram. Once that user comes up in the search results, just click on their name or avatar to select. Once you have tagged everyone, click Done.
 Next, you can mark the location for the image. Just click the Name This Location to search for the location using Foursquare. You don’t have to have a Foursquare account to do the search as Instagram is just using the service to provide locations. Once you find your location, you will be taken back to the share screen.
Sharing
 The last thing is to share your image. You will notice that Instagram will share with many of the popular social networks and sharing site, such as Facebook, Twitter, Tumblr, Flickr, and Fourquare. You can choose all of them, some of them, or none of them. After that, just click the Share button to share your image to Instagram and with the world.
![]()
Hopefully you find this introduction to Instagram helpful, and don’t forget to enter our Twitter photo competition by Febuary 14.


